Retaining Wall Installation Tips
By Masonry
The National Concrete Masonry Association offers installation guidelines in the Segmental Retaining Wall Installation Guide. However, Anchor Wall Systems provides a brief overview of the recommended installation for Anchor products:
 Step One
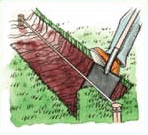
Using a shovel or a skid loader, dig a trench about 24 inches wide and deep enough to fit the required amount of buried block and compacted base. For walls four feet high and shorter, bury one course of units. Total wall height includes the height of any buried courses.
Step Two
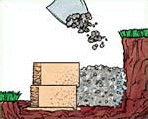
Firmly compact the soil in the bottom of the trench. Lay six inches of compactable base (e.g., sand and gravel) in the bottom of the trench and compact.
Step Three
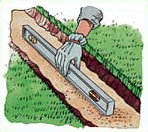
Place the first layer of Anchor units without lips on the prepared base (lips must be manually knocked off units before placement). Position the units side-by-side, in full contact with the base, and level in both directions using your carpenter's level. Backfill with free-draining aggregate.
 Step Four
Anchor recommends using a filter fabric, which should be placed directly behind the wall extending from the bottom of the base course to the middle of the top course.
Step Five
Continue assembling additional courses in a running bond pattern, pulling each unit forward until secure. Use free-draining aggregate to backfill each additional course as it is installed.
Step Six
Place drain tile behind the wall at grade to allow water to drain from the backfill (organic or clay-type soils are not recommended). Outlet the drain tile through the wall at every low point, or every 75 feet of wall length and around the ends of the wall. Backfill with free-draining gravel 12 inches behind the wall, in six-inch layers.
 Step Seven
Fill any remaining areas behind the wall with soil. Compact every 12 inches. Repeat steps five through seven until the wall reaches the desired height.
Step Eight
Firmly compact native soil every 12 inches behind the wall. Do not compact directly on top of the units.
About the Author
Masonry, the official publication of the Mason Contractors Association of America, covers every aspect of the mason contractor profession - equipment and techniques, building codes and standards, business planning, promoting your business, legal issues and more. Read or subscribe to Masonry magazine at www.masonrymagazine.com.


