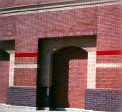
Glazed Brick Masonry
By James Tann
 Glazed brick is becoming more popular as a building material in both exterior and interior applications. As a result of this demand, the American Society for Testing and Materials (ASTM) has developed a standard dedicated to the specification of glazed brick units. This standard ? ASTM C1405, Standard Specification for Glazed Brick (Single Fired, Solid Brick Units) ? provides the user of glazed brick with minimum requirements for performance in exterior and interior environments. In addition to the requirements for quality of glazes, appearance and dimensional tolerances of glazed brick in interior applications, the standard also includes requirements for durability of the brick body when utilized for exterior exposures.
Ceramic glazed brick has been an integral part of building designs for many decades and, historically, it has performed well under all climatic conditions. Successful performance of glazed brick exterior walls can be expected through the use of conventional drainage wall types that allow water to evaporate from the brick's unglazed surface. Attention must be given to proper material selection, detailing and construction practices to ensure a successful design.
Tips and Guidelines for Designers
 Moisture Detailing ? Due to the imperviousness of the ceramic finish, glazed brick walls should be designed to drain all water that enters the wall system. This water may have its source in wind driven rain or condensation of water vapor. It is recommended, for glazed brick exterior walls, that a vented drainage type wall system be designed, detailed and constructed. This will accommodate the proper flow of collected water within the wall's cross-section.
Two common examples of drainage walls include the cavity and veneer designs utilizing a minimum two-inch cavity between wythes. In either design, flashings and weepholes need be provided at the wall base, under sills, over lintels and relief angles, and under masonry or stone caps and copings. Flashings need to be continuous around the building perimeter at the wall base, relief angles and copings. Isolated flashings, such as windowsills and lintel angles, should be treated with end dams.
Weepholes should be spaced at 24-inches on center in head joints at the elevation of the flashings. Should a rope wick be used as the weephole material, an opening should be provided in the course above. This opening could be a vent or tube insert that should be spaced at 24-inches on center. At the top of a wall expanse, vent inserts should be incorporated to allow air circulation in the drainage space. These vents should be located a course or two below the next flashing location and spaced between 24- and 48-inches on center depending on the interior humidity in the structure.
 Movement Detailing ? Brick masonry walls move with changes in temperature and moisture content. Wall detailing for the drainage-type walls utilizing a glazed brick facing wythe needs to incorporate room for brick's growth. These joints, placed vertical and horizontal, break the wall into panels. The panel size should be limited to a length of 25 feet to ensure stress levels within the masonry strength.
Panel heights will vary with the building and wall design; however, they should be placed as soft-joints under relief angles. Additional joints, vertical and horizontal, should be utilized in the building parapets to limit panel lengths to 15 feet and isolate the cap or coping from the facing wythe.
The building geometry will also indicate locations for vertical expansion joints in glazed brick walls. These areas include: corners (one side), changes in wall height, and offsets in the wall plane. All joints should extend full height from foundation to top, or from shelf angle, and be free of non-compressive materials. Typical expansion joint size is one-half inch and is finished with a backer-rod and elastic joint sealant.
Tips and Guidelines for Masons
 Ceramic glazed masonry products can be built into project wall applications with typical masonry construction practices. No unique skills or equipment are required, although when handling ceramic glazed masonry products some precautions are necessary to avoid chipping. Because of their impervious, lasting finish, most ceramic glazed masonry products are resistant to staining or job site conditions that could contaminate other building materials.
Planning Tips
- Order material at least two months ahead of desired delivery (lead times may vary).
- Shape sheets are available from your supplier.
- Quoins (corners) must be ordered as a shape.
- Quantity take-off and/or detailing services are available.
- Request a field panel for material quality and workmanship guidelines.
Additional things to consider when figuring Structural Glazed Facing Tile (SGFT):
- Quoins/Starter corners must be ordered as a shape. Are they bullnose or square?
- Internal corners.
- At windows and doors, consider the type of frame being used to determine jamb and lintel units required. E.g., if bullnose jamb and lintel, a miter shape will be needed for the transition at the corner (bonding pattern and series size will determine the miter shape needed). Wrap-around doorframes only need stretchers.
Several construction tips for proper use and handling of glazed masonry products are available. The following topics are offered for recommendations to assist in construction.
Upon Delivery
 Take normal precautions when handling ceramic glazed brick by wearing approved protective eye wear, gloves and clothing, as directed. Any questions, call your supplier.
Delivery of Material at the Job Site
- Do not place material directly on the ground for storage.
- Do not double stack cubes of material.
- Check delivered units for accuracy. Call before use if you notice any problem or discrepancy.
- Never touch areas where the ceramic glaze has been broken or chipped to avoid cuts.
- Sequence material in the order of use at the staging area as it is delivered.
- Keep units in the factory packaging ? in paper trays with dividers ? until ready to be placed in the wall by the bricklayer.
- Do not use brick tongs.
- Do not pitch or toss units.
- Stack unused material in a protected area and cover to keep clean and dry.
Preparation for Installation
In addition to the above recommendations:
- Lay-out units before placing them in the wall.
- Mark checkpoints every three to four feet to ensure proper joint spacing.
- Lay out first course without mortar to determine head joints. Avoid cutting when possible.
- If cut pieces are necessary, try to use at door jambs, corners or non-visible areas.
Installation of Ceramic Glazed Units
- Interior construction should be well lit.
- Do not use metal tools on glazed faces.
- No glazed faces in the mortar joints unless scored with a saw blade for bonding.
- Build the corner or lead the same as with face brick.
- Keep mortar joints uniform at 3/8 inch (or as specified), except for minor variations as required to maintain a bond.
- Use full, unfurrowed bed and head joints.
- If you are not sure about a unit, ask before placement.
- Look for uniform color as you go.
- Chipped or damaged units should be set aside for use as "cuts" as the job progresses.
- Cutting, drilling and repairing directions are available from your supplier.
On-Going Maintenance of Installed Units
- Use one inch (or larger) non-metallic jointer to strike joints when thumb print hard.
- After initial set ? won't smear condition ? clean area using a wood tool/stick to remove clumps of mortar. Then wipe wall with course rag such as burlap, carpet, etc. Shake rag often to clean.
- Do not use acid, abrasive powders or unauthorized cleaners.
End of Work Period
- At the end of each day or at the start of each shutdown period, cover weather-exposed walls. Use non-staining, waterproof material and extend it by at least two feet over each side of the wall. Anchor securely.
- Protect finished walls by covering with 15 pound felt paper and erect wooden barriers to protect walls from construction traffic or material movement.
- Protect glazed face from exposure to things such as welding slag, harmful chemicals and sharp or falling objects.
Final Cleandown (When mortar has cured)
- Use only clean running water.
- Wash down wall from top to bottom using water and a clean rag or soft bristled brush. Repeatedly rinse rag/brush thoroughly. Rinse wall immediately.
- For more difficult areas add a mild solution of a detergent-type masonry cleaning agent. Always follow the manufacturer's directions. Only clean small areas, one to two sq. yards at a time, and then rinse area thoroughly.
- Use wooden tool or stick on mortar clumps.
- Do not use acid, abrasive powders or unauthorized cleaners.
- If a power-wash system or steam cleaning process is being used, take special care not to damage the mortar joints. Call the brick/tile manufacturer for PSI recommendations.
- Be careful not to etch or yellow mortar joints.
- Do not use sealers or coatings.
Glazed brick masonry provides a beautiful, durable, and lasting appearance that few other materials offer. Adaptability is a fundamental feature, whether for load or non-load bearing walls and partitions, for building large structures or relatively small utility areas. Glazed brick can be used in combination with all other building materials. It offers architects, designers and specifiers limitless creative opportunity. Available in many sizes, shapes and forms, in a wide-band color spectrum, and a variety of satin and matte finishes, glazed brick is an outstanding building product choice.
About the Author
James Tann is the Executive Director for the Ceramic Glazed Masonry Institute.
For more information, please visit the Ceramic Glazed Masonry Institute's (CGMI) website at www.cgmi.org. Information on manufacturers, suppliers, specifications and handling is offered throughout the site.


