New Rules for Cleaning Contemporary Masonry Buildings
By Gary Henry
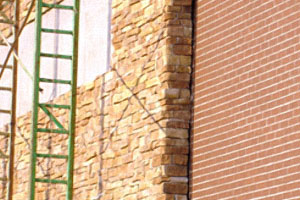
Cleaning today's relatively new concrete masonries, such as simulated stone and concrete brick, is different from cleaning clay masonry. Clay masonry typically can withstand the more aggressive cleaners needed to dissolve hardened mortar smears; however, even today's clay masonries vary enough in type to warrant specific procedures and products.
Taking this one step further, the situation gets even more complicated when you consider that many of today's buildings increasingly utilize mixtures of different types of masonries.
A typical example of this is the Municipal Building of Edgewood, Ky., completed in 2006. This structure employs red and gray clay brick, cream-colored architectural block, cast stone and precast concrete. You've seen buildings like that, and you've likely worked on some as well.
Long gone are the days when masonry simply meant red clay brick and gray mortar only. Likewise, long gone are the days of "one-size-fits-all" post-construction cleaning of new masonry construction. Given the increased use of various masonry materials, cleaning that way now can mean disaster.
The good news is that by following a few simple guidelines, you can produce great results every time on even the most complicated combinations of concrete, clay and stone masonry — natural and simulated.
Some of those well-known guidelines, like "always test before cleaning overall," are timeless; while others, like "clean early and quickly," are becoming even more increasingly important.
For masons taught in the traditions of "masonry equals brick or block," and "one-size-fits-all" cleaning, new rules — such as "know your surface" — need to be stressed.
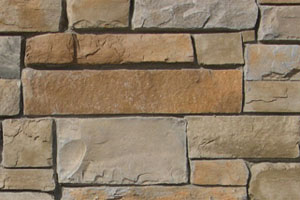
In 2003, a knowledgeable and professional contractor cleaned a two-story brick office building in Indiana. He used a proprietary product from a reputable manufacturer and followed responsible procedures, just as he always did.
Too late, the contractor discovered he was cleaning concrete brick, not clay brick. The powerful cleaner, though safe for clay brick, pitted and bleached the concrete. The contractor landed in court.
Concrete brick and simulated stone often look like clay brick and natural stone — that's the idea. While these various masonry materials often are created to look similar, each has widely different tolerances for cleaner strength and pressure washer psi.
Also, cleaners for concrete masonry often contain non-etching ingredients not used in the cleaning products for clay masonry. The small amounts of acid(s) found in cleaners for clay and concrete are usually different as well, specialized for each particular substrate.
While it would be wonderful to simply determine the material type, even individual types of clay brick or natural stone have important differences. Some clay bricks have special additives that create striking color effects; an inappropriate cleaner can react with those additives, causing hard-to-remove stains. For example, cleaning limestone or cast stone the same way you clean granite or sandstone can cause etching or bleaching on the substrate.
Know your surface! As soon as you get the job, get on site and positively identify every substrate you'll be cleaning.
2. Always Test Before Overall Cleaning
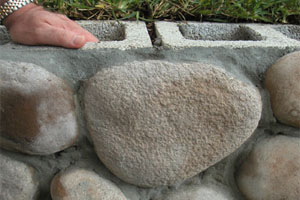
When SparkleWash International contractor Craig Christensen of Omaha, Neb., cleaned the simulated river stone exterior of Cabela's, Omaha, he followed rule number one. Christensen got on the job site as soon as he could to examine the rounded, multi-colored concrete stones.
He received samples from the mason contractor and took them back to his shop. The simulated stone used on the project came in eight colors, and Christensen tested cleaners on each one. He found that six of the stones were integrally colored and could stand up to a vigorous cleaning with the right product. However, the other two sported a cementitious surface coating to give them their color. The cleaning technique that worked on the six integrally colored stones bleached the other two.
Christensen completed further tests until a satisfactory method was achieved. After his shop tests, Christensen field-tested his cleaning procedures on an out-of-the-way spot of the Cabela's wall, in the same conditions in which he planned to clean.
The knowledge gained from testing guided Christensen to a successful job. It was a project that could have easily tripped up someone with a more casual approach.
Always test, and always clean under the same conditions in which you tested.
3. Use the Mildest Cleaner and Dilution That Still Gives Effective Results
Because concrete masonry has some of the same components as the mortar films and smears that have to be removed, cleaners for concrete masonry are gentler than those for clay. The best concrete and manufactured stone cleaners are precisely balanced — just strong enough to dissolve films and mortar smears that aren't fully hardened, yet safe enough to do so without harming the masonry.
On a building that combines clay and concrete masonry, the cleaner made for clay might harm the concrete masonry, unless you take precautions. However, if you cleaned the building early enough — before the excess mortar has fully hardened — the same gentle cleaner and dilution that's safe for concrete will also effectively clean the clay brick.
Which brings up rule number four — clean early and quickly.
4. Clean Early and Quickly
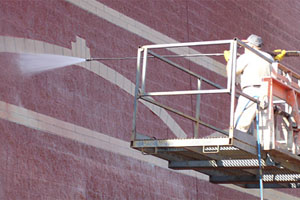
An Indianapolis mason contractor didn't have enough water on site to clean a new concrete brick car dealership once it was completed. Instead, he waited 60 days until a waterline and hydrant were installed. By then, the smears and films of the high-strength mortar had become too hard for the relatively gentle cleaner to dissolve. Although he had chosen a high-quality cleaner, the clean down was ineffective. The general contractor's idea was to tear it down and start again, at a price tag of $100,000 — which he thought the mason contractor should cover.
Don't give mortar smears and films a chance to become as hard as the masonry itself — remove it while it's still relatively soft. It's acceptable to clean most concrete masonry within seven to 21 days of installation. However, high-strength mortars — such as type M or S mortars — and grout are another matter; clean those within three to seven days.
Since cleaners for clay brick are more aggressive than those for concrete and simulated stone, the cleaning window is a little different — 14 to 28 days is about right.
Whether you're cleaning clay or concrete, the general principal is the same: The earlier you remove the excess mortar within the cleaning time window, the more easily it will come off. With this being said, however, don't clean before the appropriate window of time, as you risk damaging the mortar joints.
5. Use the Right Cleaner for the Right Job
How do you know what the right cleaner is for any given masonry? Chances are the masonry manufacturer will be glad to tell you. It's an increasingly common practice for manufacturers to have their products tested by an independent lab to see which cleaners work best, and at what dilution. This crucial information is often supplied automatically in the form of a pallet tag on every cube of masonry. If not, manufacturers will usually be glad to give you their recommendations for cleaning their products. Remember: it's in manufacturers' best interests, as well as your own, to have projects come out looking as beautiful as you can make them.
On a project with multiple masonry types, you may be able to clean the entire building with one cleaner — IF — you clean it early enough in the window of time appropriate and use the mildest cleaner and dilution possible (refer to rules three and four). Otherwise, follow the masonry manufacturer's guidelines for cleaning each type of masonry.
6. Never Clean with Raw Acid
Once upon a time, raw acid was all that was available to clean masonry. Since those days, advances in the manufacture of masonry and other construction materials have made use of raw acids, such as muriatic acid, very dangerous. In particular, muriatic acid is impure in content and inconsistent in strength. It can — and has — stained and etched nearly every type of masonry, leading many a contractor into a legal bed of thorns.
Simply put: Don't use it!
Don't Spare the Water
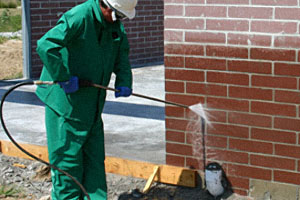
Lots of water is one of the secrets to a great masonry clean down. Before applying the cleaner, drench the masonry (i.e., pre-wetting). When the masonry pores are filled with water, the cleaner can't soak in and it stays on the surface where it does its job of dissolving excess mortar and dirt.
Use more water to rinse the spent cleaner, dissolved mortar and dirt off of the wall. Use the appropriate cleaning equipment; we're not talking garden hose here, as weak rinsing can leave stains and residue. Ideally, rinse with 400 to 1,000 psi, at six to eight gallons per minute.
Clean Bottom to Top, Keeping Lower Areas Wet
A contractor in New Orleans began cleaning at the top of a building, one that features red clay brick and red mortar above white cast stone. He paid no attention to keeping the areas beneath the cleaning area wet. The result was that reddish rundown from the cleaning soaked into the white cast stone, leaving nasty streaks. Fortunately, a remedial cleaner corrected the situation; however, the cleaning contractor was required to do the remedial cleaning at his own expense, which amounted to thousands of dollars in lost revenue and several weeks of lost time.
Unlike many other types of cleaning, masonry clean down begins at the bottom and works up, making it easier to keep lower parts of walls wet. Keeping the walls wet stops rundown from penetrating into them. That's important, if you plan to make money on your jobs.
Follow All Safety Precautions in the Product Literature
Many of these guidelines are commonsense, like "don't get this product in your eyes," or "wear protective clothing." Guidelines such as "don't cut or alter these cleaners with other chemicals or with bleaches" keep people and masonry safe.
Use your chosen cleaner only as specified; results may be unpredictable if you use the cleaner for anything else. By closely following all safety guidelines — written by field service experts — you maximize your chances for a successful, accident-free cleaning job.
In Cold Weather, Remember the "40 and Rising" Rule
Though you get the best results when air and surface temperatures are well above freezing, construction schedules often dictate that cleaning takes place when conditions are less than ideal. If you have to clean during cold weather follow these tips:
- Water-saturated masonry is vulnerable to freeze/thaw damage. Never clean if the masonry could freeze before drying.
- Cleaners and rinse water rely on chemical reactions to dissolve and rinse away construction soiling. Cold temperatures slow these chemical reactions. Compensating for the cold by using a stronger cleaning solution may cause permanent damage to the masonry, especially today's sensitive colored concrete and manufactured stone.
- Instead, extend the dwell time of the properly diluted cleaning solution by 10 to 20 percent. Scrub areas of heavy soiling with a masonry brush. Pre-wetting and rinsing with hot water also warms the surface and improves results.
- Schedule wet cleaning for when air and surface temperatures are 40ºF and rising. That's the "40 and Rising" rule. In cold weather, this means your wet cleaning window may only be a few hours around noon. Use the time before and after to remove heavy accumulations of excess mortar and job dirt from the next day's work area with dry brushing and scraping.
- If a limited cleaning window is impractical, enclose the work area with polyethylene and use space heaters to warm the masonry. This extends your workday and improves results.
- One final caution: Warm weather test panels won't work for cold weather cleaning. Test in cold to clean in cold.
About the Author
Gary Henry is a business communication specialist with PROSOCO, a national manufacturer of products for cleaning, protecting and maintaining masonry, concrete and stone. For more information, contact Gary Henry at 785-830-7343, or e-mail ghenry@prosoco.com.


